The scheduler in Snooper Professional is easy to setup, very flexible and is managed by setting up different scheduled events.
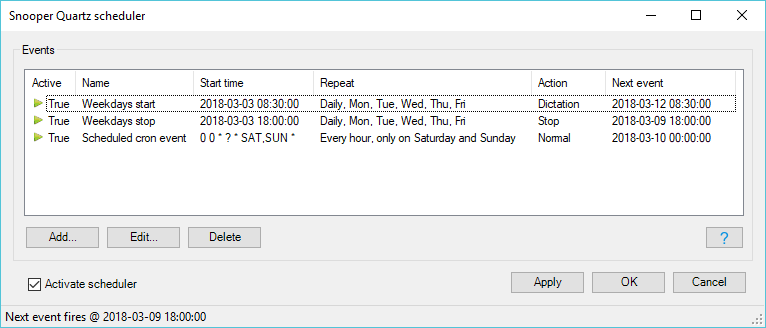
Snooper Pro scheduler
Setup events
There are two types of events, Standard event and Cron event.
To setup more complex repeat intervals use the Cron event otherwise use the Standard event.
Note! To start and stop a recording you normally need to create two events, one for starting a recording and one for stopping it!
The Action field in an event could contain one of these actions:
| Action | Description |
|---|---|
| Start Normal mode | Saves current recording and then starts a new recording in Normal mode. |
| Start Dictation mode | Saves current recording and then starts a new recording in Dictation mode. |
| Start Sound activated mode | Saves current recording and then starts a new recording in Sound activated mode. |
| Start Test mode | Saves current recording and then Starts in Test mode. |
| Stop recorder | Saves current recording and then Stops the recorder. |
| Shutdown Snooper Professional | Saves current recording and then shuts down Snooper Pro. |
Standard event
Press the Add button.
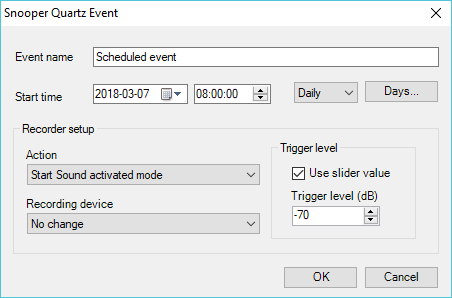
Scheduled to start recording at 8 every day.
Enter the start time, select Daily or Once, optionally press the Days button to select the weekdays.
Set the recording mode and the recording device. Select recording device “No change” if the already selected recording device should be used.
To stop a recording, add another event with Action set to “Stop recorder”.
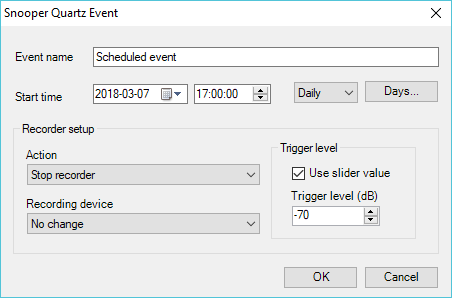
Scheduled to stop recording at 17 every day.
Cron event
Right-click the list view and select Add Cron event.
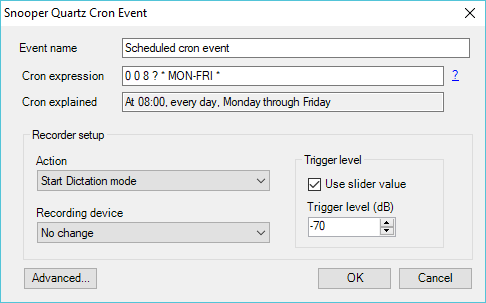
Scheduled to start at 8 every weekday between Mon-Fri
Enter a valid Cron expression.
Set the recording mode and the recording device.
To stop a recording add another event with Action set to “Stop recorder”.
Under the Advanced button you have the option to select when the event should be expired.
Example of how to start a recording beginning on every hour
Every Action of a start recording will always start a new recording, so in this example it will create a new recording on every hour, no need to create a stop event.
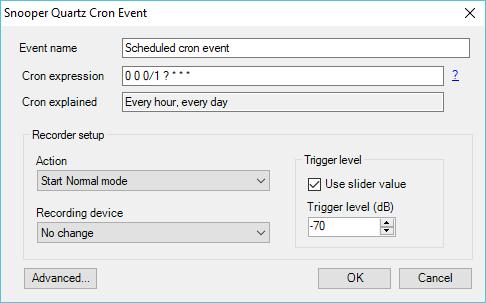
Scheduled to create a new recording on every hour
